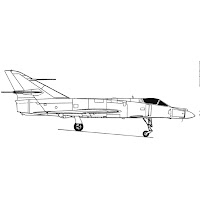
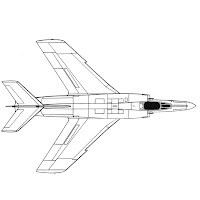
In the afternoon we were given a plane blue print which showed the front, side and top view. Below are the blueprints:


Using tehse blueprints I had to try and model the plane the best I could, using all the techniques I know so far.
I began by creating 3 50 by 50 planes in 3D, one for each view, therefore there were two faceing sideways and one flat. in order to align them, i used the align tool and aligned the z axis to of the two upright planes to the flat one. Once I done this, I imported the blueprints into the material editor and applied them to the scene. I changed the object properties, ticking backface cull and unticking show frozen in grey. I then froze the 3 planes.
Once I had done this, I began modelling. I started by creating a box and moving it so it was aligned of the body of the side view, top view and front view. I converted the box into an editable poly and deleted the pixels from each side. I used the connect tool to create a vertical line down the middle of my object and deleted 1 side so I could use the symettry tool. I then turned the object see through using alt+x & I began selecting and looping the outside edges, extruding them along the line of the plane, using the move tool and resize tool to recreate the basic shape of the blueprint. I did this in the front view first and then the side view.
When it came to the back wing, I struggled; I was not able to remodel it well and it started giving me problems when it came to my topology on that part of the model. Below is how my plane looke dby the end of the day:
As you can see the back looks good from the side but from the top and the front does not look right


No comments:
Post a Comment